
Views: 0 Author: Site Editor Publish Time: 2026-08-01 Origin: Site


Finding the right balance between architectural beauty and everyday illumination is notoriously difficult. Homeowners frequently struggle to brighten their spaces without compromising their interior design vision. You want a fixture that looks elegant while still providing the exact amount of light necessary for daily tasks. Relying purely on stylistic preferences often leads to poorly lit rooms, awkward installations, and frustrating shadow lines across your work surfaces. To avoid these common mistakes, you must evaluate fixtures based on strict spatial constraints, required lumen output, and practical installation realities.
Proper lighting requires more than just picking a pretty shade off a shelf. This comprehensive guide breaks down the seven essential functional types of Pendant Lighting. We provide the exact sizing formulas, technical criteria, and safety ratings necessary for your specific room. You will learn exactly how to align your design goals with functional illumination requirements, ensuring a confident and structurally sound purchase decision.
Form follows function: The choice of pendant type must align with the primary use case (e.g., downward-directional light for islands vs. diffused light for dining).
Rule of scale: Proper sizing relies on standard mathematical formulas (Room Length + Width in feet = Fixture Diameter in inches).
Clearance matters: Standard installation requires maintaining 30–36 inches of clearance between the bottom of the fixture and a countertop or table.
Compliance dictates placement: Wet or damp locations (like bathrooms or covered patios) require specific UL/ETL ratings regardless of fixture style.
You must assess your architectural needs before purchasing new fixtures. Pendants lower the light source directly to a human scale. They bring illumination closer to your work surface while significantly reducing ceiling glare. However, they demand dedicated vertical space. You cannot easily install them in rooms with low, eight-foot ceilings without risking visual clutter or physical obstruction. Compare your options carefully to determine if suspended fixtures make the most architectural sense for your specific layout.
Define your primary success criteria early in the design process. Suspended fixtures typically serve as localized task lighting. You will frequently see them installed above kitchen islands, reading nooks, or bathroom vanities. They also excel as decorative accent lighting. However, they rarely provide enough broad coverage to act as your sole light source. You usually need supplementary recessed lights to achieve full-room ambient coverage. Layering your illumination ensures you eliminate dark corners and uncomfortable shadows.
Do not ignore your underlying ceiling infrastructure. You must have pre-existing ceiling junction boxes placed exactly where you want the fixtures to hang. You also need appropriate weight-bearing support braced to the ceiling joists. Finally, ensure your electrical system supports compatible wall dimmers. Dimmability gives you total control over the mood and functionality of the space.
Lighting Format | Primary Application | Spatial Requirements | Ambient Coverage |
|---|---|---|---|
Pendant Fixtures | Task and Accent | High vertical clearance required | Low to Medium |
Recessed (Can) Lights | General Ambient | Requires deep ceiling cavities | High |
Track Lighting | Directional/Spotlight | Minimal vertical clearance | Medium |
Mini pendants deliver highly concentrated, directional task lighting. They typically feature shades measuring under eight inches in diameter. Manufacturers design them to push light directly downward onto a focused surface. You rarely use them individually. Instead, they shine best in multi-fixture installations.
You will frequently group them in sets of three over kitchen islands or peninsulas. They also work exceptionally well flanking bathroom vanities in place of traditional wall sconces. When evaluating mini pendants, you must assess their beam spread carefully. Narrow shades create a tight spotlight effect. Therefore, you must space them closely together. We recommend keeping them 24 to 30 inches apart. This specific spacing prevents frustrating dark spots on your crucial work surfaces.
Dome and bowl styles offer broad, predictable illumination. A standard downward-facing dome casts a wide net of light over a large surface. Conversely, an inverted bowl reflects light upward onto the ceiling. This upward reflection creates a soft, ambient glow throughout the room.
These fixtures serve brilliantly over circular dining tables and cozy breakfast nooks. They also act as strong central focal points in standard-height rooms. Your primary evaluation metric here is the interior shade finish. Always check the inside of the dome. White enamel or metallic gold interiors maximize downward lumen output by reflecting the bulb's light. Dark interiors, on the other hand, absorb the light and severely restrict the overall spread.
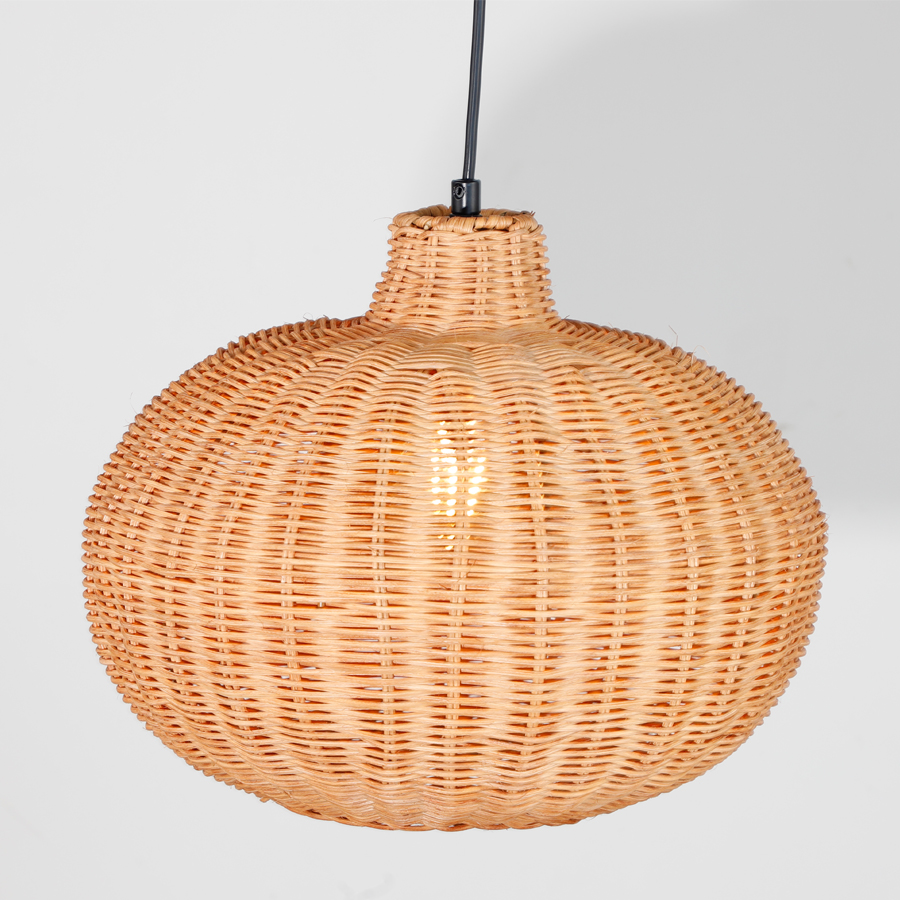
Drum pendants provide soft, 360-degree diffused ambient lighting. They feature cylindrical shades typically made of fabric, parchment, or woven materials. The shade fully surrounds the light source, eliminating harsh glare from every viewing angle. Many drum fixtures also include a bottom acrylic diffuser to further soften the downward light.
They work perfectly in bedrooms, living rooms, and transitional hallways. You generally want generalized illumination in these spaces without harsh shadows. However, you must consider the maintenance requirements. Fabric shades trap dust easily. They are highly susceptible to absorbing cooking odors and airborne grease. We strongly advise you to avoid placing fabric drum fixtures in active, heavily utilized kitchen prep zones.
Linear pendants provide continuous, unbroken illumination across elongated surfaces. Instead of a single central bulb, they feature a long, rectangular profile housing multiple light sources or a continuous LED strip. This design eliminates the scalloped lighting effect often caused by spacing multiple round fixtures too far apart.
They look stunning over rectangular dining tables and extra-long kitchen islands. You will also see them frequently in commercial-style home workspaces. A major benefit is electrical simplicity. A linear fixture covers a massive visual footprint while utilizing only a single ceiling junction box. When shopping, check the lifespan of integrated LED models. You want to ensure the internal components offer long-term reliability since you cannot simply unscrew and replace a burnt-out diode.
Globe styles offer stunning, omnidirectional light distribution. They feature completely spherical shades, usually crafted from glass or durable acrylic. Light emits equally in every single direction, illuminating the ceiling, walls, and floor simultaneously.
They fit perfectly within mid-century modern design aesthetics. You often see them suspended elegantly in tall stairwells or grouped together in dramatic cluster installations. When evaluating globes, you must pay close attention to glass opacity. Frosted or opal glass diffuses the light, reducing glare heavily. Clear glass globes look highly architectural but expose the bare bulb. If you choose clear glass, you must use low-lumen, aesthetically pleasing bulbs. Vintage-style Edison bulbs prevent serious eye strain while keeping the fixture visually interesting.
Lantern fixtures offer architectural framing with minimal visual obstruction. They rely heavily on a rigid geometric frame rather than a traditional solid shade. The open-cage design allows you to see right through the fixture. This maintains open sightlines across your room, making the space feel significantly larger.
You should place them in entryways, foyers, and high-ceiling hallways. They deliver immense traditional or transitional style. However, you must evaluate their shadow output. The geometric metal frames frequently cast distinct, harsh shadow lines across your walls and surfaces. If you require shadowless lighting for detailed task work, you must ensure your secondary recessed lighting compensates for the lantern's structural interference.
Exposed bulb fixtures represent the ultimate minimalist approach. They strip away the shade entirely, leaving only a decorative cord, a stylized socket, and a bare bulb. They provide highly customizable accent lighting tailored to very specific moods.
They thrive in industrial interior designs. They also solve difficult spatial problems. If your ceiling junction box sits off-center, you can use a swag-hook installation to drape the cord exactly where you need the light. Success with this type depends entirely on bulb quality. You need bulbs with a high Color Rendering Index (CRI). You must also verify cord durability. Keep in mind that stiff fabric cords often require heavy metal weights or several weeks of hanging time to fully un-kink and hang perfectly straight.
Selecting the right design means nothing if the technical specifications fail your room's requirements. You must align the fixture's output capabilities with your specific daily activities. Do not guess your required brightness levels. Use established industry benchmarks to guide your purchase.
Lumen Output Requirements: Brightness matters heavily. For active kitchen task zones, you need 35 to 50 lumens per square foot of counter space. For relaxed, ambient living spaces, you only need 10 to 20 lumens per square foot.
Color Temperature (Kelvins): You must match the light's color to the room's function. Choose 2700K to 3000K (warm white) for relaxed dining areas and bedrooms. Choose 3500K to 4000K (cool white) for high-contrast kitchen prep zones.
Dimmability Standard: Always verify dimmer compatibility before installing. Integrated LED fixtures require specific ELV (Electronic Low Voltage) or LED-compatible dimmer switches. Standard incandescent dimmers will cause severe flickering and buzzing.
Safety & Compliance Ratings: Water ruins electrical fixtures rapidly. Restrict your selections strictly to "Damp-Rated" or "Wet-Rated" products if you plan to install them near sinks, over freestanding tubs, or in unconditioned covered patios. Industry UL/ETL ratings ensure your safety.
Improper installation scale ruins even the most expensive lighting fixtures. A light that is too small looks disconnected and cheap. A light that is too large overwhelms the space and creates physical hazards. You must rely on objective mathematical rules to plan your placement.
The Sizing Formula: You can easily calculate the ideal single-pendant diameter for a central room fixture. Measure your room's length and width in feet. Add those two numbers together. That sum equals the ideal fixture diameter in inches. For example, a 10-foot by 12-foot dining room needs a fixture approximately 22 inches in diameter. For kitchen islands, ensure the fixture remains at least 12 inches narrower than the total island width. This critical buffer prevents tall guests from bumping their heads when leaning forward.
Suspension Height Rules: Height dictates both visual harmony and physical comfort. When hanging fixtures over surfaces like dining tables or kitchen counters, the bottom of the fixture must sit 30 to 36 inches above the surface. When hanging fixtures over open floors or walking paths, the bottom of the fixture must sit at least 7 feet (84 inches) from the floor to clear doorways and heads.
Mounting Hardware Constraints: Evaluate your ceiling architecture closely. Sloped or vaulted ceilings require special hardware. Rigid metal downrods demand a specialized sloped-ceiling adapter canopy to hang straight. Conversely, flexible fabric cords or metal chains will self-adjust to gravity automatically.
Weight Limits: Large, heavy fixtures pose a serious safety risk. Standard plastic junction boxes only hold limited weight. If your selected fixture weighs over 50 pounds, you must install a reinforced metal junction box braced directly to the wooden ceiling joists.
Before you finalize your order, you must scrutinize the hardware specifics and maintenance expectations. Many buyers overlook the practical realities of owning the fixture long-term. You need to differentiate between standard E26 base fixtures and modern integrated LED alternatives.
Standard E26 base models generally cost less upfront. They allow you to easily replace burnt-out bulbs or swap color temperatures whenever you want. Integrated LED fixtures carry a higher initial price tag but offer incredibly sleek profiles and massive lifespans. However, they feature non-replaceable lighting diodes. Once the internal LED driver fails, you must usually replace the entire fixture.
Next, meticulously check the included mounting hardware. Ensure the manufacturer's packaging includes sufficient downrod lengths, chain links, or cord yardage for your specific ceiling height. Standard retail kits frequently only accommodate ceiling heights up to nine feet. If you have vaulted ceilings, you will likely need to purchase additional extension rods simultaneously.
Finally, thoroughly review the vendor's warranty and return policies. Large lighting fixtures are highly prone to transit damage. Delicate glass globes and thin ceramic shades crack easily during shipping. You must prioritize vendors who offer straightforward return policies and keep replacement shades readily available in their inventory.
Upgrading your home with Pendant Lighting transforms both the utility and the aesthetic appeal of your space. Success requires a methodical approach. First, define the exact function of the room. Decide if you need intense task illumination or soft ambient light. Next, calculate the spatial math using the standard scale and height formulas. Then, select the specific functional type that matches your design vision while meeting your lumen requirements.
Finally, always verify the technical compatibility of your dimmers, ceiling slope, and electrical boxes. Do not rush the final step. Grab your tape measure, document your exact spatial constraints, and consult a licensed electrician to confirm your existing junction box capacities before finalizing your purchase.
A: Generally, no. These fixtures excel at focused task or localized accent illumination. Relying on them exclusively often leaves the perimeter of the room dark and creates harsh, unappealing shadows. You should layer them with supplementary recessed lights or wall sconces to ensure balanced, full-room ambient coverage.
A: The standard industry rule dictates spacing them 24 to 30 inches apart. You must measure this distance from the center of one fixture to the center of the next. This precise spacing prevents dark, unlit gaps on your kitchen island or counter surface while maintaining visual harmony.
A: Integrated LEDs feature the light diodes built directly into the fixture's chassis. They offer extremely sleek, ultra-thin designs with lifespans stretching decades, but you cannot change a bulb if they fail. Standard models use traditional sockets, requiring separate, easily replaceable bulbs.
A: No, they are not. Fixtures suspended by flexible cords or chains naturally hang straight down due to gravity, making them inherently compatible. However, fixtures utilizing rigid metal stems or downrods require a specific, hinged sloped-ceiling canopy adapter to hang vertically. Always verify adapter inclusion before buying.


