
Views: 0 Author: Site Editor Publish Time: 2026-08-14 Origin: Site


Selecting the right lighting fixtures fundamentally transforms how you experience your home. You cannot rely on overhead fixtures alone to create a welcoming environment. The nuances of spatial design require careful planning and strategic placement.
Selecting the right Wall Lights goes beyond aesthetics; it requires balancing functional lighting layers, spatial constraints, and electrical infrastructure. Poorly selected wall fixtures lead to harsh glare, inadequate task lighting, or costly drywall rework due to incorrect hardwiring placement. You must evaluate these elements before making a final decision.
This guide provides a comprehensive room-by-room evaluation framework. We detail technical specifications, installation realities, and compliance standards like IP ratings. By the end, you will confidently finalize your lighting purchases. You will understand exactly how to illuminate your space effectively.
Function Dictates Form: Wall lights must be evaluated based on their primary role—ambient, task, or accent lighting—before considering style.
Room-Specific Rules: Each space demands different technical specs; bathrooms require strict IP safety ratings, while bedrooms require specialized color temperatures (Kelvins) and dimming capabilities.
Implementation Constraints: The choice between hardwired and plug-in fixtures drastically impacts project budget, timeline, and installation complexity.
Placement is Mathematical: Standardized height and spacing rules (e.g., 60–65 inches from the floor) ensure optimal light distribution and visual symmetry.
Successful interior illumination relies on a three-layer lighting framework. You need ambient, task, and accent lighting. Ceiling fixtures often cast harsh downward shadows. Floor lamps consume valuable floor space. Sconces perfectly bridge this gap. They sit safely at eye level. They push light horizontally across the room. This balances the overall brightness. We recommend mapping out your existing light sources first. You can then identify the dark gaps.
You should always evaluate fixtures based on outcomes. Do not just look at physical features. We categorize their use cases into three primary roles:
Task Lighting: These include swing-arm or directional sconces. You use them for reading or detailed work. They focus a tight beam exactly where you need it.
Accent Lighting: This category covers picture lights or uplights. They highlight architectural features or artwork. They draw the eye to specific focal points.
Ambient Lighting: These are diffused, flush-mounted fixtures. They wash walls in a soft glow. They effectively reduce high-contrast shadows in a room.
You must embrace certain baseline assumptions before shopping. Sconces rarely act as standalone solutions. They perform best within a broader lighting ecosystem. You cannot expect a single sconce to illuminate an entire living room. They work alongside chandeliers, table lamps, and recessed cans. This creates a cohesive, layered environment.
What to watch out for: Avoid installing highly decorative sconces in areas requiring intense focus. A beautifully crafted opaque glass fixture might look stunning. However, it will fail miserably as a reading light. Always match the fixture type to its intended daily function.
Manufacturers design specific fixtures to solve unique spatial problems. Understanding these categories prevents costly design mistakes. You need to know the technical strengths of each type. This ensures your selection performs as intended.
Traditional Wall Sconces
These fixtures excel in symmetrical placement scenarios. You often see them flanking mirrors or fireplaces. They typically feature fabric shades or glass diffusers. They offer beautifully balanced, diffused light. They soften harsh angles in traditional or transitional spaces.
Swing-Arm & Articulating Lamps
These models are highly functional. They serve as ideal solutions for tight spaces. You might lack room for bedside tables. An articulating lamp solves this problem. It gives you adaptable task angles. You can push it flat against the wall when not in use.
Picture & Display Lights
These specialized fixtures provide a narrow-beam distribution. You evaluate them primarily on their Color Rendering Index (CRI). A high CRI ensures accurate artwork illumination. They also use LED diodes to prevent UV damage. This protects delicate paintings from fading over time.
Uplights and Downlights (Wall Washers)
You evaluate these based on spatial manipulation. Uplighting bounces light off the ceiling. This makes low ceilings feel substantially higher. Downlighting directs focus toward the floor. This grounds a large room and creates a cozy atmosphere. They excel in modern, minimalist environments.
ADA-Compliant Flush Mounts
These are crucial for narrow hallways or stairwells. The Americans with Disabilities Act (ADA) mandates specific dimensions for public spaces. Low-profile fixtures must extend 4 inches or less from the wall. This legal requirement often influences residential design too. It prevents accidental bumps in tight transit areas. They offer sleek, unobtrusive aesthetics.
Best Practices: Always check the depth of a fixture if you have narrow corridors. A bulky sconce can quickly become a physical hazard. Stick to ADA-compliant options in these specific zones.
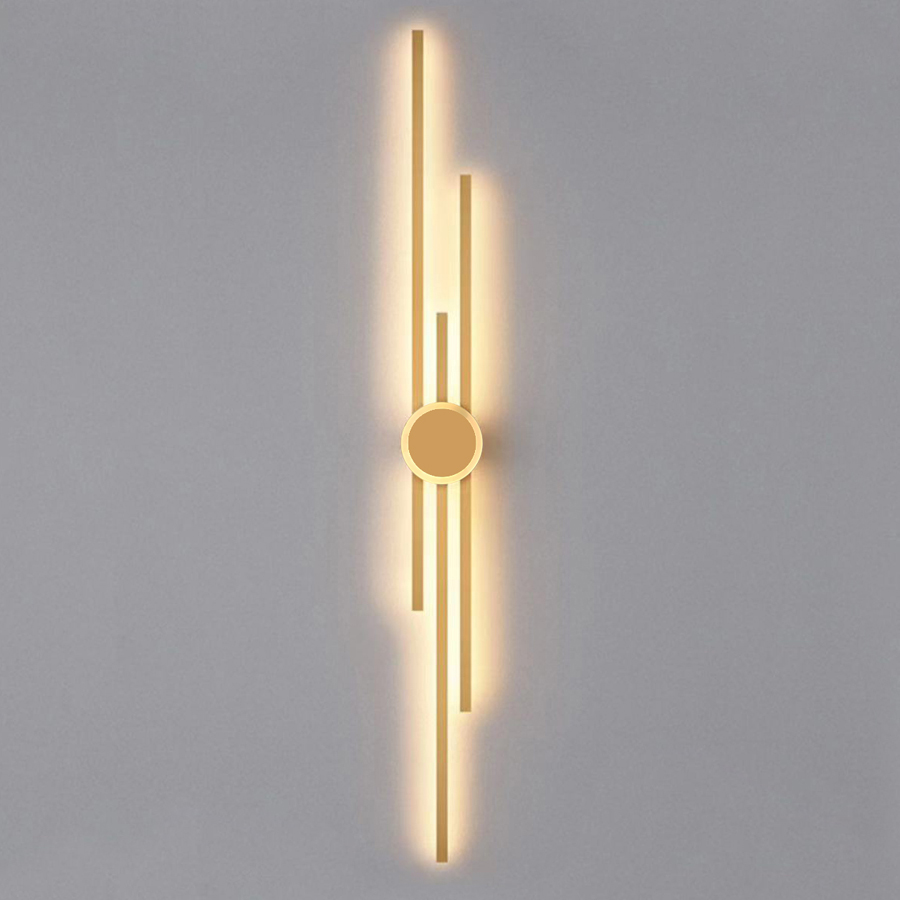
Every room dictates a unique set of lighting rules. You cannot use the exact same fixture in a damp bathroom and a cozy bedroom. Safety codes and human comfort drive these decisions. We break down the exact strategies you need for each major space.
Living Room Strategies
Your primary goal involves creating mood and highlighting architecture. The evaluation lens focuses heavily on ambiance. Look for dimmable fixtures. You want a 2700K color temperature for maximum warmth. The design must complement your primary chandelier or ceiling fan. Sconces here should act as supporting players. They should not dominate the visual hierarchy.
Bedroom Considerations
The bedroom demands unobtrusive task lighting and deep relaxation. Your evaluation lens must prioritize user control. Look for independent switching options. A toggle switch on the backplate is highly convenient. You also need a localized beam spread. This allows you to read without disturbing your partner. Always prioritize eye-level glare reduction. Frosted glass or deep shades work best.
Bathroom & Vanity Constraints
Bathrooms require shadow-free facial illumination. They also demand strict safety compliance. Your evaluation lens must focus on performance metrics. The fixture must have a high CRI (90+). This ensures accurate color reflection for makeup or shaving. You must also navigate mandatory IP ratings. Areas near water sources require an IP44 minimum rating. This ensures electrical safety and strict code compliance.
Hallways & Entryways
These transition zones prioritize safe transit and visual rhythm. The evaluation lens focuses on geometry and automation. You need shallow-depth profiles to keep pathways clear. Consistent spacing matters greatly. You should typically place them 8 to 10 feet apart. We highly recommend integration with automated smart switches. This ensures you never walk into a dark corridor.
Room-Specific Lighting Guidelines
Room Type | Primary Goal | Ideal Color Temp | Key Compliance / Feature |
|---|---|---|---|
Living Room | Ambiance & Mood | 2700K | Dimmable compatibility |
Bedroom | Task Reading | 2700K - 3000K | Independent backplate switch |
Bathroom | Facial Illumination | 3000K | IP44 Rating, CRI 90+ |
Hallways | Safe Transit | 3000K | ADA compliance (under 4 inches) |
Selecting reliable fixtures requires a basic understanding of lighting technology. You must look past the external finish. The internal components determine how the light actually performs. We will evaluate the core technical metrics you need to know.
Lumens vs. Watts
You must frame your purchasing decisions around brightness, not energy consumption. Watts only measure the energy a bulb draws. Lumens measure the actual light output. Modern LEDs use very few watts to produce massive brightness. Therefore, you must shop by lumens. We recommend 300 to 400 lumens for soft accent lighting. You should aim for 700 or more lumens for dedicated task lighting.
Color Temperature (Kelvin)
Color temperature dramatically shifts the psychological feel of a room. We measure this in Kelvins (K). Lower numbers produce yellow, warm light. Higher numbers produce blue, cool light. Keep residential living spaces between 2700K and 3000K. This provides inviting residential warmth. Reserve 3500K to 4000K for high-contrast task areas. You might use these cooler temperatures in garages or specific utility spaces.
Integrated LED vs. Replaceable Bulbs
The industry currently offers two distinct structural paths. You must choose between integrated panels and traditional sockets. Each has clear advantages and drawbacks.
Integrated LED: These feature permanent diodes built into the chassis. They allow for much slimmer profiles. They boast a significantly longer lifespan. However, they pose a maintenance risk. You must replace the entire fixture if the internal driver fails.
Replaceable Bulbs (E26/E12 bases): These utilize traditional screw-in sockets. They are entirely future-proof. You can easily customize the bulb shape or color temperature later. However, the physical socket limits the design. The fixture cannot be as exceptionally thin as an integrated model.
Common Mistake: Do not mix different color temperatures in the same room. Placing a 4000K sconce next to a 2700K table lamp creates visual chaos. Always synchronize the Kelvins across your entire lighting layer.
Great design fails without proper execution. Installation dictates the final polish of your lighting project. You face immediate choices regarding electrical infrastructure. You also must adhere to strict mathematical placement rules. Ignoring these realities leads to frustrating delays and subpar results.
Hardwired vs. Plug-in Economics
Your budget and timeline depend heavily on how you power the fixtures. Hardwiring provides the most professional look. However, it requires licensed electricians. You face wall chasing, drywall patching, and repainting. This carries a high upfront cost. It provides a flawless, seamless finish.
Plug-in sconces offer immediate deployment. You avoid drywall destruction completely. They boast a much lower upfront cost. However, they visually impact the space. You will have exposed cords hanging down the wall. You must evaluate cord covers as a potential mitigation strategy. Metal cord channels can blend neatly into modern aesthetics.
Standardized Placement Math
Interior designers rely on standardized geometry for placement. Guessing ruins visual symmetry. Follow these foundational rules for optimal results:
Height: Mount fixtures 60 to 65 inches from the finished floor to the center of the backplate. You should adjust this slightly based on ceiling height. You can also adjust it based on the primary occupant's height.
Vanity Spacing: Bathroom lights require specific placement. Flank the mirror at eye level. Space them approximately 36 to 40 inches apart. This setup eliminates under-eye shadows significantly better than overhead vanity lights.
Dimming Infrastructure
You face a significant technical risk regarding dimming compatibility. Not all switches work with all LEDs. You must ensure the chosen wall light, the LED bulb, and the wall dimmer switch use the same protocol. Common protocols include ELV (Electronic Low Voltage) or TRIAC. Mismatched protocols result in severe issues. The lights will flicker constantly. They might also produce an annoying buzzing sound. Verify compatibility sheets before purchasing hardware.
Choosing proper illumination requires a systematic approach. You should follow a clear shortlisting logic. First, identify the room's core function. Second, determine your capacity for hardwiring versus plug-in models. Third, filter your options by technical requirements. Check IP ratings for bathrooms and lumen output for reading nooks. Finally, select the stylistic finish.
Take concrete next steps before clicking buy. We recommend consulting a licensed electrician for hardwiring estimates. This prevents unexpected project delays. Grab a tape measure and some painter's tape. Visually map out the fixture dimensions directly on your wall. This simple exercise guarantees perfect scale and placement every single time.
A: Generally no. They rarely produce enough widespread illumination. You might use them as primary sources only if the room is very small. You could also succeed by layering multiple high-lumen wall washers. They perform best when utilized as secondary ambient or task layers.
A: You should follow the standard 60 to 65-inch rule. Measure from the floor to the center of the fixture. You can make exceptions for high vaulted ceilings. You also adjust this height for specific over-bed reading applications to match eye level.
A: Yes. Bathroom fixtures face constant moisture exposure. You must emphasize strict IP ratings. Look for damp or wet location certifications. This crucial step avoids long-term metal corrosion. It also prevents severe electrical safety hazards near water.
A: You should place them typically 8 to 10 feet apart. Stagger them evenly on opposite walls. This zigzag pattern provides excellent coverage. It effectively breaks up long corridors. It also avoids creating a sterile, rigid "runway" effect.


